

5.0
Owner's of the Leica Digital Camera 18450 gave it a score of 5.0 out of 5. Here's how the scores stacked up:

129
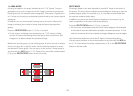
SPEED PRIORITY MODE
The speed priority mode automatically controls the exposure based on the
manually set shutter speed. It is therefore particularly well suited for taking
pictures of moving subjects, where the sharpness of the movement portrayed
– which is determined by the shutter speed used – is the crucial element of
composition.
By manually pre-selecting an appropriately fast shutter speed, you can there-
fore prevent unwanted blurring of the movement – you can „freeze” your
subject. Or, in reverse, you can express the dynamics of the movement with a
deliberate „wiping” eect using a correspondingly slower shutter speed.
To set this mode, turn the aperture dial (1.9) to the
A
position and set the de-
sired shutter speed with the respective dial (1.10).
• The mode is indicated by
T
(2.1.1). In addition, the manually set shutter
speed appears – in white - (2.1.17).
To take a picture with this mode
1. Press the shutter release button (1.8) to its pressure point
• The automatically set aperture appears in white (2.1.20).
If even the fully opened or closed aperture in conjunction with the set
shutter speed would result in under- or overexposure, both values turn red
as an indication.
If the automatically set aperture value seems appropriate for the intended
composition:
2. Press the shutter release button all the way down to take the photograph.
If not, you can change the shutter speed before pressing the shutter release
button.
APERTURE PRIORITY MODE
Aperture priority mode automatically controls the exposure based on the
manually set aperture. It is therefore particularly well suited for taking pictures
where the depth of field – which is determined by the aperture used – is the
crucial element of composition.
By manually pre-selecting an appropriately low aperture value (= large aper-
ture) you can reduce the depth of eld, for example in a portrait to let a face
„stand out”, i.e. be shown clearly in front of an unimportant or distracting
background. Or, in reverse, with a correspondingly high aperture value (= small
aperture) you can increase the depth of field, in order to reproduce everything
from the foreground to the background clearly in a landscape photograph.
To set this mode, turn the shutter speed dial (1.10) to the
A
position and set
the desired aperture with the respective dial (1.9).
• The mode is indicated by
A
(2.1.1). In addition, the manually set aperture ap-
pears in white (2.1.20).
To take a picture with this mode
1. Press the shutter release button (1.8) to its pressure point.
• The automatically set shutter speed appears in white (2.1.17).
If even the fastest or slowest shutter speed in conjunction with the set
aperture speed would result in under- or overexposure, both values turn
red as an indication.
If the automatically set shutter speed seems appropriate for the intended
composition:
2. Press the shutter release button all the way down to take the photograph.
If not, you can change the shutter speed before pressing the shutter release
button.


Find Your Products By Category
Please Login
