

5.0
Owner's of the Leica Digital Camera 18450 gave it a score of 5.0 out of 5. Here's how the scores stacked up:


Note:
When using faster shutter speeds, in terms of the image there is hardly any dif-
ference, or only for rapid movements between the two firing moments.
FLASH EXPOSURE COMPENSATION
This function can be used to selectively reduce or strengthen the ash expo-
sure regardless of the exposure of the available light, e.g. in a picture taken
outside in the evening, to lighten the face of a person in the foreground while
retaining the lighting atmosphere.
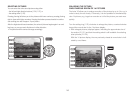
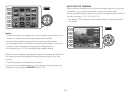
1. To set a ash exposure compensation, press the upper
EV+/-
direction but-
ton (1.23) three times.
• The corresponding sub-menu appears.
2. Select the desired compensation value with the left and right direction
buttons (1.24/1.27). Values from +3 to -3EV with
1
/
3
EV increments are
available.
3. Confirm the setting by pressing either the shutter release button (1.8) or the
MENU/SET
button (1.25).
• The exposure compensation symbol and the set value (2.1.14) appear.
Notes:
• A brighter ash illumination chosen with a plus compensation requires
higher ash output and vice versa. Therefore ash exposure compensations
influence the flash range more or less considerably: A plus compensation
reduces the range, a minus compensation increases it.
• The
EV
/direction button is also used to call up the menus for exposure
bracketing (see next section) and ash exposure compensation (see p. 132).
They scroll through in an endless loop and can therefore be selected by re-
peatedly pressing the button.
• A set compensation remains active until it is switched to ±0 (see step 2.),
i.e. after any number of shots and even if the camera is switched off.
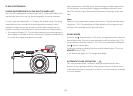
USING EXTERNAL FLASH UNITS
The ISO flash shoe (1.11) of the Leica X2 also allows the use of more powerful,
external ash units. We specically recommend using dedicated units such as
the Leica SF 24D (see p. 153).
As soon as an external ash unit is attached, if ash modes with pre-ash func-
tion (
/ /
) are set, they are changed to the otherwise same
modes without pre-flash (
/ /
) and displayed accordingly.
However, when the flash unit is removed, the camera is reset to the originally
set mode.
On the Leica SF 24D, the mode
TTL/GNC
should be set to allow automatic
control by the camera. When set to
A
, subjects with above or below average
brightness may not be optimally exposed. When set to
M
, the ash exposure
must be adjusted to the aperture and distance values specified by the camera
by setting a corresponding reduced power output level.
Notes:
• When an external ash unit is attached, it must also be turned on, i.e. ready
to use, otherwise incorrect exposures and incorrect messages on the cam-
era may result.
• Simultaneous use of the electronic viewnder EVF 2 (see p. 152) is not pos-
sible.
137


Find Your Products By Category
Please Login
