

5.0
Owner's of the Leica Digital Camera 18450 gave it a score of 5.0 out of 5. Here's how the scores stacked up:

MANUAL MODE
If, for example, you want to achieve a particular eect, which is only possible
with a quite specic exposure, or if you want to ensure that several pictures
with dierent trimming have an absolutely identical exposure, then you can
manually set both shutter speed and aperture.
To set this mode, set the desired values on both the shutter speed and aper-
ture dials (1.10/1.9).
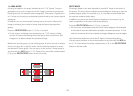
• The mode is indicated by
M
(2.1.1). In addition, the manually set shutter
speed (2.1.17) and aperture (2.1.20) appear in white.
To take a picture with this mode
1. Press the shutter release button (1.8) to its pressure point.
• The light balance scale (2.1.18) appears. It covers a range of ±2EV (expo-
sure value) in increments of
1
/
3
EV.
Settings within ±2EV of the correct exposure for the targeted subject are
represented by one of the scale marks turning red. Settings beyond ±2EV
are indicated by the – or + marks at the ends of the scale turning red.
To achieve a correct exposure, adjust your shutter speed and/or aperture set-
tings so that the center mark is red.
2. Press the shutter release button all the way down to take the photograph.
METERING MEMORY-LOCK
For composition reasons, it can be beneficial not to have the main subject in
the center of the picture. However, placing it off-center from the start would
often lead to the metering being based on a part of the subject significantly
closer or further away. This is equally valid for the 1 point and spot AF metering
modes (see pp. 122/123) with respect to sharpness, and the exposure modes
P, T and A (see pp. 128/129) with respect to dierences in brightness. The
result would then be that the main subject is out of focus and/or rendered
unfavorably dark or light.
As a solution, the Leica X2’s metering memory-lock function allows you to
measure the main subject first and then to retain this setting until you have
decided on your final trimming and take the picture.
The procedure:
1. Aim the respective AF-frame (2.1.8/2.1.9) and/or the green exposure me-
tering spot (2.1.10) at that part of your subject which you want to have cor-
rectly focused and exposed. As soon as focus and exposure have been set
and locked by pressing the shutter release button to the first pressure point
(s. p. 147), the color of the AF frame changes to green and the focus signal
(1.19) lights up as confirmation.
2. Continue to hold the shutter release button halfway down and then select
your final trimming by moving the camera.
3. Press the shutter release button all the way down to take the photograph.
Note:
You can lock measured values any number of times before taking the picture.
130


Find Your Products By Category
Please Login
